
 By kevin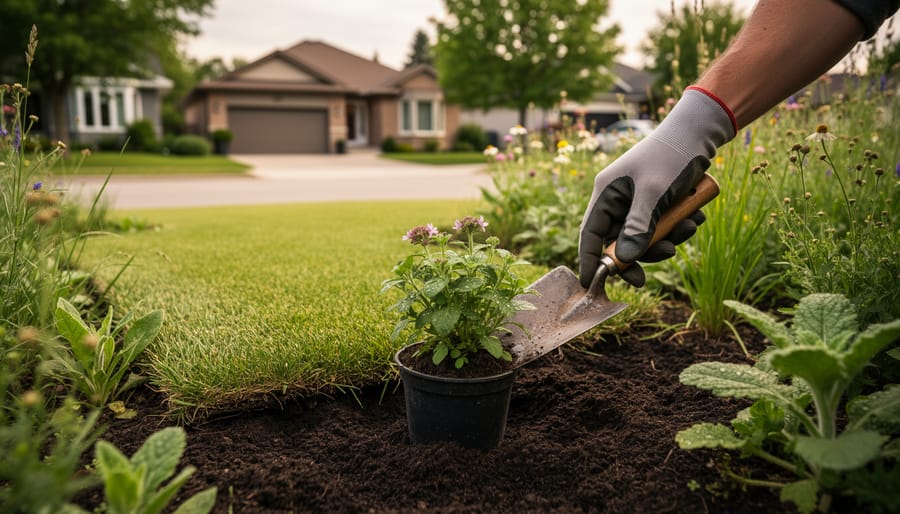
Transforming your traditional lawn into a natural yard means replacing high-maintenance turf with native plants, wildflowers, and low-growing ground covers that support local ecosystems while dramatically reducing water use, chemical inputs, and mowing time. The process takes three to six months from planning to establishment, requires moderate physical effort, and demands careful attention to municipal bylaws that may restrict natural landscaping in your community.
Across Canada in 2026, thousands of homeowners are making this shift as part of broader climate action recognizing that conventional lawns consume roughly 30% of urban water supplies and depend on pesticides and fertilizers that harm pollinators, soil health, and waterways. A natural yard flips this model entirely. Once established, native plant communities thrive on rainfall alone, provide critical habitat for declining bird and insect populations, and create living root systems that sequester carbon and prevent erosion.
But the transition isn’t just about choosing plants. Many Canadian municipalities still enforce “weed control” bylaws that penalize homeowners for allowing native species to grow beyond arbitrary height limits, a legacy of mid-century aesthetic standards that ignored ecological function. Understanding your legal landscape before breaking ground can save you from fines and forced mowing orders.
This guide walks you through the complete process, from assessing your property and navigating local regulations to selecting regionally appropriate species and working with Indigenous knowledge holders who have stewarded these landscapes for millennia. You’ll learn not only how to create a thriving natural yard but also how to protect it legally and inspire policy change in your community.
What You’ll Need: Materials and Resources for Your Natural Yard Transition
Transforming your traditional lawn requires both physical tools and knowledge resources, but the investment is modest compared to the long-term savings you’ll realize from eliminating lawn care costs. Most items can be borrowed, rented, or purchased second-hand, and unlike conventional landscaping, this is largely a one-time expenditure rather than an ongoing cycle of mowers, fertilizers, and sprinkler repairs.
Essential Tools and Materials
- Garden spade and shovel for digging planting holes and moving soil
- Wheelbarrow or garden cart for transporting mulch, plants, and materials
- Sod cutter (rental) if removing large lawn areas quickly, or cardboard and newspapers for sheet mulching
- Rake for spreading mulch and preparing planting beds
- Garden hose with spray nozzle or watering can for initial plant establishment
- Organic mulch such as wood chips, shredded leaves, or bark (4-6 inches deep across planting areas)
- Compost or well-aged manure to improve soil structure and fertility
- Native plants appropriate to your ecoregion, sourced from reputable native plant nurseries
- Soil testing kit to assess pH, nutrients, and composition before planting
- Work gloves, knee pads, and sun protection for comfort during installation
Knowledge Resources and Plant Sources
Your success depends as much on information as physical materials. Regional native plant guides specific to Canadian ecoregions will help you select species adapted to your climate, soil type, and moisture conditions. Provincial native plant societies maintain databases of appropriate species and often host plant sales with expert advice included.
Connecting with local Indigenous communities can provide invaluable traditional ecological knowledge about which plants historically thrived in your area and their relationships within the ecosystem. Many First Nations organizations offer workshops on traditional plant uses and land stewardship practices that enrich your understanding beyond conventional gardening approaches.
Municipal environmental departments sometimes provide free or subsidized native plants, rain barrels, and compost to residents undertaking ecological landscaping. Conservation authorities and watershed groups often have native plant sales and can recommend species that support local biodiversity corridors and water quality goals.
Online resources like the Canadian Wildlife Federation’s Garden Habitat program and Evergreen’s Native Plant Database offer searchable tools to identify plants by region, growing conditions, and wildlife value. These platforms help ensure your selections genuinely support pollinators, birds, and beneficial insects rather than ornamental cultivars marketed as native-friendly.
Before You Begin: Important Considerations and Legal Awareness
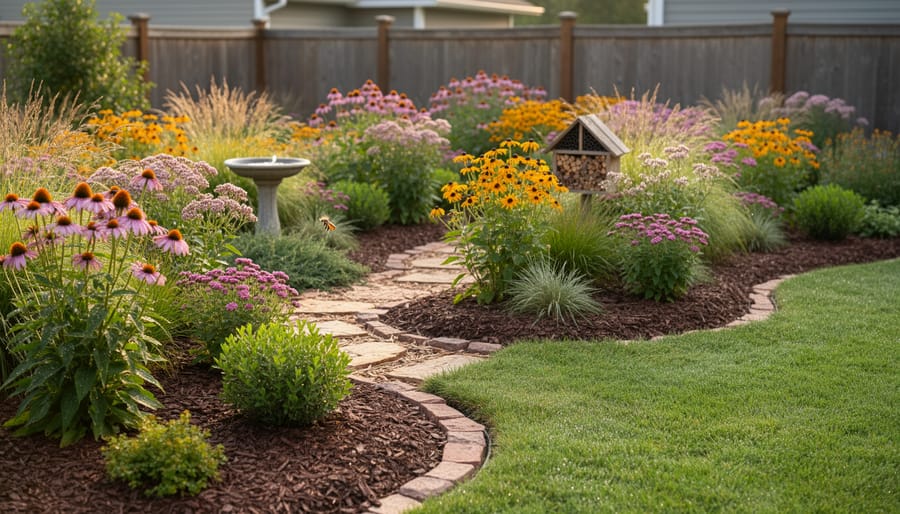
Before transforming your lawn, take time to understand the legal landscape and ecological responsibilities in your area. Canada’s municipalities have a patchwork of bylaws governing yard maintenance, and some still enforce grass-cutting ordinances that can conflict with natural landscaping. Research your city’s property standards bylaws, which often specify maximum grass height or require “neat and tidy” appearances. These vague standards have historically been used to penalize homeowners who let native plants grow naturally. However, recent legal victories across Canada have established precedents protecting the right to native plant gardens, particularly when they support biodiversity and environmental health.
If your property has a homeowners’ association or restrictive covenants, review these agreements carefully. Some neighborhoods require approval for landscape changes or prohibit native meadows. Document your ecological intentions with a written plan and photos showing deliberate design rather than neglect. Many HOAs respond positively when presented with the environmental benefits and reduced water use of natural yards.
Equally important is identifying invasive species already present on your property. Plants like buckthorn, dog-strangling vine, or purple loosestrife can dominate natural yards if not removed before planting natives. Learn to distinguish invasives from native look-alikes using regional field guides or local naturalist groups. Never move soil or plants between properties without checking for invasive seeds.
Avoid all pesticides during your transition. Herbicides harm soil microbiomes that native plants depend on, and insecticides kill the pollinators you’re trying to attract. If you’ve recently treated your lawn chemically, wait at least one growing season before planting natives.
Consider reaching out to local Indigenous communities or land stewards for guidance on traditional ecological knowledge. Many First Nations have maintained relationships with native plants for millennia and can offer insights into culturally appropriate species selection and land care practices that strengthen both ecological and cultural connections to place.
Step-by-Step: Converting Your Traditional Lawn to a Natural Yard
Step 1: Assess Your Site and Set Goals
Begin by spending a full day observing your property at different times. Note where sunlight hits hardest (south-facing areas get 6+ hours), where shade lingers, and which spots stay soggy after rain. Dig a small test hole about 30 centimeters deep to check your soil: clay clumps when squeezed, sand falls apart, loam holds shape but crumbles. These observations determine which native species will thrive.
Next, clarify what you want this space to become. A pollinator meadow needs full sun and well-drained soil. A rain garden handles wet spots by filtering runoff with moisture-loving natives like Joe-Pye weed. A food forest layers fruit trees, berry shrubs, and edible groundcovers in partial shade. You can combine purposes, a sunny meadow edge transitioning to shaded woodland plantings.
Consider consulting local Indigenous communities about traditional relationships with native plants. Many First Nations have used species like sweetgrass, wild bergamot, and three sisters gardens for generations. This knowledge adds cultural depth and ecological wisdom to your design, connecting your yard to centuries of land stewardship practiced long before European lawns arrived.
Step 2: Design Your Native Plant Layout
Start by identifying your ecoregion, Canada has fourteen distinct zones from coastal rainforests to boreal plains, each with its own native plant palette. Use provincial native plant databases, botanical garden resources, and local naturalist groups to build your species list. The Canadian Wildlife Federation and provincial conservation authorities offer searchable databases by postal code.
Prioritize keystone species that support the most wildlife: oaks, willows, and native berries feed dozens of bird and insect species, creating cascading benefits through the ecosystem. Aim for a mix of trees, shrubs, and perennials that flower and fruit at different times, ensuring food sources from early spring through fall. Include grasses and sedges for structure and winter interest.
Sketch your layout on paper, grouping plants by water and light needs. Place taller species where they won’t shade sun-lovers, and cluster similar moisture requirements together. Consider consulting local Indigenous communities or cultural centers about traditional plant uses and relationships, many First Nations maintain seed libraries and share ecological knowledge that deepens your understanding of how plants function within the broader landscape. This collaborative approach honors the land’s original stewards while creating more resilient, culturally meaningful spaces.
Step 3: Remove or Reduce Your Existing Lawn
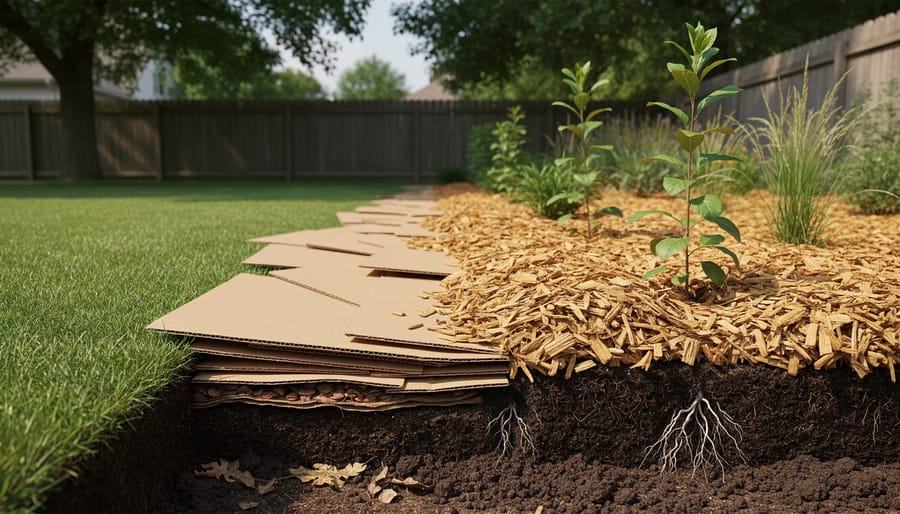
The most sustainable lawn removal methods build soil health while eliminating grass, no herbicides required. Sheet mulching (the “lasagna method”) works beautifully for most homeowners: cut grass short, cover the area with overlapping layers of cardboard or newspaper, then add 4-6 inches of wood chips or compost. This smothers the lawn over 3-4 months while feeding soil microbes and earthworms. Start in fall to have planting beds ready by spring.
For faster results, rent a sod cutter to physically remove grass and roots in strips. This creates immediate planting space but removes topsoil, you’ll need to rebuild it with compost. Save removed sod to create berms or compost it elsewhere on your property.
Solarization uses clear plastic tarps to cook grass and weed seeds using solar heat over 6-8 weeks during hot summer months. It’s chemical-free but less effective in cool climates.
Choose your method based on timeline and scale: sheet mulching for patience and soil building, sod cutting for immediate transformation, solarization for summer projects in warmer regions. All three avoid the watershed contamination and soil degradation that glyphosate-based herbicides cause.
Step 4: Prepare and Amend Your Soil
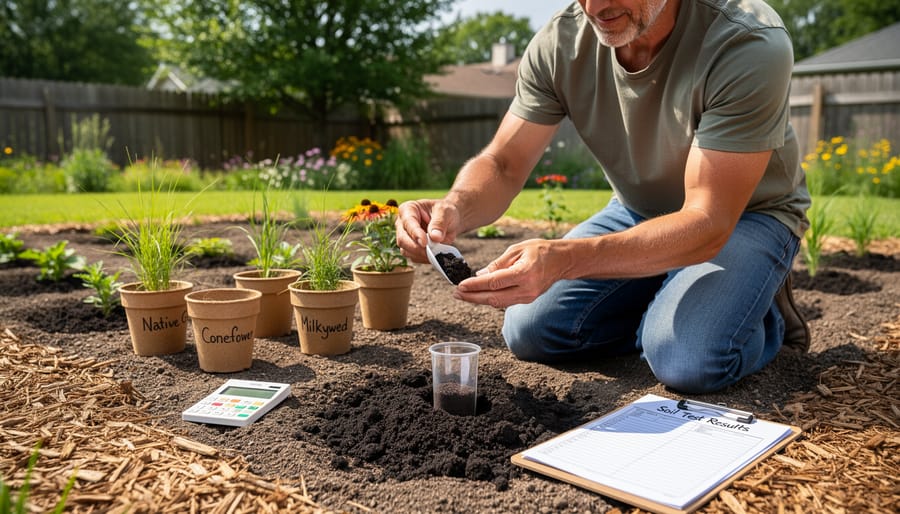
Years of mowing and chemical treatments leave lawn soil compacted and lifeless. Before planting, dig a small test hole to check how easily water drains and whether earthworms are present. Compacted soil prevents roots from spreading and suffocates beneficial microbes that native plants depend on.
Start by aerating compacted areas with a garden fork, driving it in and rocking back to create air pockets without turning the soil completely. Spread a three-inch layer of finished compost over the planting area to rebuild organic matter and introduce beneficial organisms. If your site is severely degraded, consider adding composted leaf mold or well-aged wood chips to improve structure over time.
Traditional fertilizer runoff causes pollution in waterways, but compost feeds the soil and habitat without leaching harmful chemicals. Native plants evolved in lean conditions and actually perform better in moderately fertile soil than over-amended beds. Your goal is healthy soil biology, not a nutrient-rich growing medium that encourages aggressive growth and disease.
Step 5: Plant Your Native Species
With your soil prepared and your design in hand, it’s time to get plants in the ground. Timing matters: spring and fall offer the best conditions for native species in most Canadian regions, when temperatures are moderate and rainfall is typically higher. Fall planting is often ideal because roots establish during cool, moist months before winter dormancy, giving plants a head start come spring.
Before you dig, arrange plants in their pots according to your layout. Group species with similar water and light requirements together, drought-tolerant prairie species in full sun, woodland wildflowers in shade, moisture-lovers near downspouts or low spots. This clustering mimics natural plant communities and simplifies future care.
Dig holes twice as wide as the root ball but no deeper. Place each plant at the same depth it grew in its container; planting too deep suffocates roots. Gently loosen any circling roots and spread them outward. Backfill with your amended soil, firming it gently to eliminate air pockets without compacting.
Water thoroughly immediately after planting to settle soil around roots. For the first growing season, water deeply once or twice weekly during dry spells, encouraging roots to grow downward rather than staying shallow. Native species become drought-tolerant once established, but they need consistent moisture initially to anchor themselves in your yard’s ecosystem.
Step 6: Mulch and Establish Pathways
After planting, a thick layer of organic mulch becomes your natural yard’s protective blanket. Spread 5-10 cm of chemical-free wood chips, shredded leaves, or bark around plants, keeping mulch a few inches from stems to prevent rot. This layer suppresses weeds by blocking light, holds moisture through dry spells, and slowly decomposes to feed soil life below. Arborist wood chips are often free from tree care companies, while autumn leaves offer a nutrient-rich option you already have.
Well-placed pathways transform a natural yard from “unmaintained” to intentionally designed. They guide foot traffic away from plant roots, showcase your effort, and reassure skeptical neighbors that your yard is cared for. Use the six-step pathway process:
- Mark desired routes with stakes and string where people naturally walk
- Remove vegetation along path lines, creating 60-90 cm wide corridors
- Lay cardboard or landscape fabric as a weed barrier
- Edge paths with logs, stones, or metal strips for clean definition
- Fill with 7-10 cm of gravel, wood chips, or flagstone
- Compact the surface by walking it or using a tamper
Curved paths feel more natural than straight lines and create visual interest. Stone or gravel paths drain well and last decades, while wood chip paths soften underfoot and blend into woodland settings. Paths also serve as firebreaks in dry regions and mulched edges between your natural yard and neighbors’ properties demonstrate clear boundaries and intentional care.
How to Know Your Natural Yard Is Thriving: Verification and Success Indicators
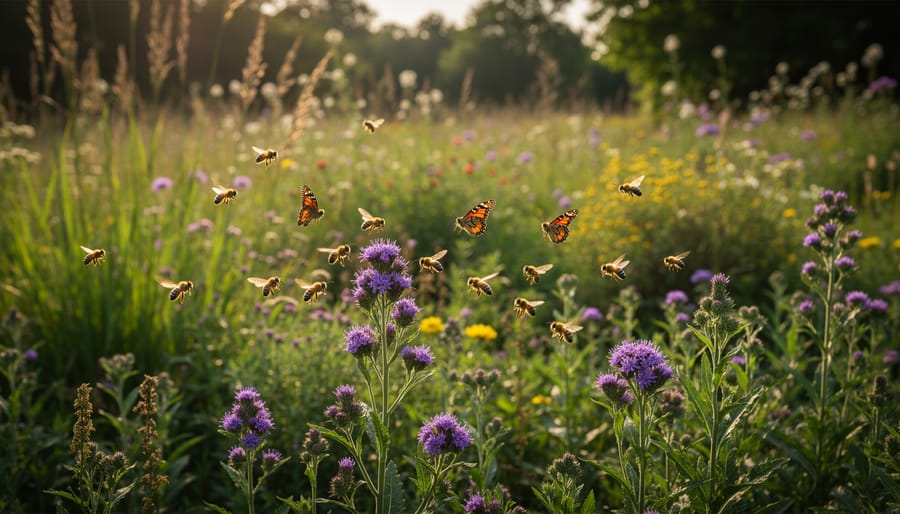
Your natural yard demonstrates success through observable recovery signals that emerge over the first one to three growing seasons. The most immediate indicator is native plant survival: aim for at least 80% establishment by the end of the first year, with plants showing new growth, fuller foliage, and expanding root systems. You should notice reduced watering needs by the second season as deep-rooted natives access moisture that shallow lawn grass could never reach.
Wildlife activity provides powerful verification. Count the number of pollinator species you observe during ten-minute observation periods in different seasons. A successful natural yard will attract native bees, butterflies, moths, and hummingbirds that rarely visited your lawn. Bird activity increases as seed-producing native plants and shelter emerge. Look for beneficial insects like ladybugs, lacewings, and ground beetles, which indicate a balanced ecosystem forming.
Soil health improves measurably. Dig a small test hole after a year: you should see darker soil color, more earthworms, better soil structure that crumbles rather than clumps, and visible organic matter breaking down. Your soil will hold water longer and drain better simultaneously, signs of restored soil biology.
Maintenance reduction is quantifiable. Track hours spent on yard work and water bills. Most natural yards require 75% less maintenance time and 50-90% less water than traditional lawns once established. If plants struggle despite proper care, consult a local native plant society or Indigenous land stewardship organization. Persistent failures often indicate mismatched species selection for your microclimate rather than poor technique.
Ongoing Care and Next Steps for Your Natural Yard
Your natural yard’s first year requires attentive care, but maintenance drops dramatically after establishment. In spring, pull any invasive seedlings before they mature and add a fresh layer of organic mulch to suppress weeds and feed soil life. Summer means occasional watering during extreme drought, native plants develop deep roots that make them far more resilient than turf once established. Fall is ideal for planting new species and leaving seed heads standing to feed overwintering birds. Winter requires almost nothing; resist the urge to tidy. Dead stems insulate beneficial insects and provide structure under snow.
Some native species spread aggressively in optimal conditions. If goldenrod or wild bergamot colonize beyond their planned areas, simply pull or cut them back in early spring. This isn’t failure, it’s abundance. Channel that vigor by transplanting divisions to expand habitat or sharing with neighbors curious about your transformation.
Increase biodiversity each year by adding species you initially overlooked. Observe which pollinators visit, then research their host plants. Notice bare spots in winter and fill them with evergreen natives. Your yard becomes more resilient and beautiful as complexity builds.
Climate resilience depends on connected habitat corridors. Talk with neighbors about your project, many are more receptive once they see yours thriving. Share seedlings and success stories. Photograph wildlife visitors to demonstrate ecological value.
Attend municipal council meetings when lawn bylaws come up for review. Legal victories in Ontario and British Columbia have established precedents protecting natural landscaping as environmentally responsible land stewardship. Connect with local naturalist groups and organizations advocating for native plant rights. Your yard isn’t just personal, it’s part of a growing movement restoring Canada’s ecosystems one property at a time.
Common Questions About Natural Yard Transitions
Will a natural yard cost more than maintaining a traditional lawn?
After the initial investment in native plants and setup (typically $1,500, $3,000 for an average yard), natural yards cost significantly less to maintain. You’ll eliminate expenses for gas-powered mowers, synthetic fertilizers, pesticides, and irrigation systems that traditional lawns require continuously.
How long before my natural yard looks established?
Most native perennials and grasses show noticeable growth in their first season but reach maturity in two to three years. The first year they sleep, the second they creep, the third they leap, patience during establishment pays off with decades of self-sustaining beauty.
What if my neighbors complain that my yard looks messy?
Defined edges, clear pathways, and visible structure help demonstrate intentional design. Many municipalities in Canada now recognize natural landscaping as legitimate land use, and organizations like Nature’s Resilience Canada can provide legal support if you face unjustified complaints under outdated bylaws.
Do natural yards attract more pests like ticks or mosquitoes?
Natural yards actually support predators that control pest populations, birds eat mosquito larvae, native plants don’t create the dense tick habitat that overgrown non-native vegetation does. Diverse ecosystems self-regulate better than monoculture lawns, which often require pesticides to manage problems.
Are natural yards safe for children and pets?
Yes, they’re safer than chemically-treated lawns. Native plants eliminate pesticide and herbicide exposure, and most species are non-toxic. You can designate play areas with low groundcovers or clover, and pets adapt quickly to naturalized spaces.
What will my natural yard look like in winter?
Winter interest comes from seed heads, ornamental grasses, evergreen shrubs, and structural elements that provide food and shelter for overwintering wildlife. Instead of dead brown turf, you’ll see texture, movement, and ecological purpose throughout the cold months.
If you receive a municipal complaint, respond promptly with documentation of your intentional landscaping plan. Photograph your yard throughout the seasons to show establishment progress and ecological value. Several Canadian court cases have protected homeowners’ rights to natural landscaping when challenged under vague weed or maintenance bylaws, precedents exist in Ontario and British Columbia where natural yards were deemed legally compliant. Contact environmental law groups early if you anticipate resistance, and consider presenting your plans to neighbors proactively to build community support.
The transition period between lawn removal and full establishment can look sparse, which is when complaints most often arise. Counter this by mulching bare soil, installing temporary signage explaining your project, and inviting neighbors to observe the wildlife your yard attracts. Once native plants fill in, objections typically disappear as people recognize the beauty of meadow grasses swaying in the breeze, butterflies visiting native flowers, and birds nesting in shrubs that a sterile lawn could never support.
Transforming your lawn into a natural yard is more than an aesthetic choice, it’s an act of environmental stewardship that ripples outward from your property line. Every square meter you convert becomes part of a larger biodiversity corridor, offering refuge to pollinators whose populations have declined sharply across Canada. Your natural yard helps filter stormwater, reducing the strain on municipal infrastructure and protecting local watersheds from the fertilizer and pesticide runoff that plagues conventional landscapes. As climate patterns shift, these native plant communities demonstrate remarkable resilience, requiring far less water and maintenance while sequestering carbon and cooling urban heat islands.
You also gain legal ground with each successful transition. Court decisions across Canada increasingly recognize the ecological value of natural landscaping, and your thriving yard strengthens the case for sensible bylaw reform. Share photos of your space with neighbors, document the wildlife it attracts, and speak at municipal meetings when restrictive grass-cutting bylaws come up for review. Connect with organizations like Nature’s Resilience Canada to access legal resources, find solidarity with other natural yard advocates, and amplify calls for policy change that protects our collective right to heal the land.
Your natural yard isn’t just yours, it belongs to the larger movement toward environmental justice, reconciliation with Indigenous land wisdom, and a livable future. Start today, and help reshape the landscape for generations to come.